I am writing this because when I was looking to start vending years ago I had a hard time finding insider information on how the whole vending business went. I ending up failing a lot in the first season, broken canopy, destroyed merchandise, and the list goes on and on and on. So here are the 5 things I learned vending the farmers market in my first year of business. Those five things I wish I could go back and tell myself from the past.

1. Go simple. And I mean simple. Think over your display and try to pair it down to just a few simple things to best show off your work. I made the mistake of a rack and a table and another table and some other random stand and nothing matched. I was so focused on the sewing that I didn’t stop to see the bigger picture and that my booth looked like a flea market (and not in a good way). Now I have a system of black pipe and fittings that can change depending on my booth size. And it’s still not perfect but it’s simple and people can see what they came to see and that is clothing. I wish I would have just started with one rack of clothing and that’s it. no table, nothing else. I think I would have saved a lot of time and stress.
Also, focus on 1-2 identical products at first. Don’t overwhelm yourself with too much. You are just starting so be kind to yourself and develop your product before being face to face with the customer.

2. Watch the weather. Especially the wind. 10%-20% chance of rain is probably not a bad day at the market but add a thunderstorm and winds over 10-15 mph and you don’t want to be there. Nobody else will be there especially customers. So just skip it. Make sure the market rules allow you to do so and if you need to call the market master to verify you won’t make so you don’t get banned from the market for not showing up. Make sure you have a good social media presence and following to announce everywhere that you will not be there and why and most people understand.
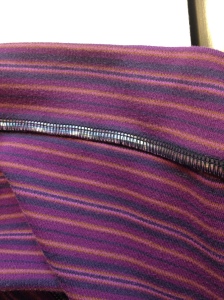
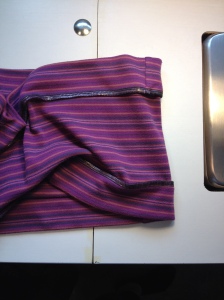
Of course a festival is a totally different story. Your canopy is the most important tool you will have. Do yourself a favor and get a more expensive one with walls that is heavy duty. The cheap ones break quickly and easily and then you are out $100. This a few markets into my first season. A freak sudden thunderstorm rolled in and just ripped everything to pieces. I lost a ton of inventory, my canopy, my display and a lot of confidence. Also on this topic. You need weights (at least 40# per leg) and heavy duty straps for your canopy to keep it from flying. I will even weight a rack of clothing if that’s all I have out because a gust can take over your rack in a second and destroy all of your hard work.

Notice in the bottom left corner the white cylinder PVC weight. This is a day I just had a rack of clothing but the wind was blowing.
3. The People are AWESOME! Be prepared to talk a lot, don’t be a salesman, be genuine and go knowing that you are going to meet some of the most amazing people you have ever met in your life. Approach being there like you are there to meet people. Keep your head up and know that some days you will set up and make $0 and pay $5-15 in a fee but you will have met some amazing folks and from you conversations with them about the world, your work, your passion you will see them come back in a few weeks and you passion will have made an impression. Just hang in there and stay positive no matter what. I struggled with that in my first year and I wish I would have been more laid back and positive.
Not only are the customers awesome but you will find a whole new family with your fellow vendors. Help your neighbor if you see them struggling with something. If their rack falls over help them pick it up, if their stuff is flying away try and help grab stuff! Offer to watch people’s booth while they pee/get coffee/get food. You will need all of those favors returned so plan on be a part of the community it’s a wonderful eccentric group of lovely people. Don’t be afraid to ask for help if you are struggling with a canopy and can’t get it popped up alone because most likely your neighbor will give you a hand.

4. Don’t undersell your work. Price it to allow you to cover you supplies, labor, possible wholesale in the future, market fees, utility bills, and everything. You have to know that your worth from day one and reflect that in your work. This gives you room to have a sale if you want, or offer a quantity to customers buying a bulk amount of items. But mostly make sure you are making more than $1 an hour….or minimum wage at least. There is nothing that I struggled with more than this. I would price something low because I wanted to sell it but didn’t take into account any factors because I just had no clue. then when I realized it and needed to raise my prices I had a few customers get upset. So it’s good to have it figured out before you are face to face with the customer.
5. Have Business Cards and an Online Presence. Hand them out to anyone that you can after you have talked to them and they are interested but on their way out. If you tell them you are online and hand them a card at the beginning they will just take it and walk off. Chat with them, explain your work and when they say I just don’t have money right now hand them a card so they can find you in the future. Most people will say, “We just got here and we’re going to make our rounds. I’ll think and come back.” If you hand them a card before they go and you have a good online store they can shop in their pajamas and see you the following week or order online.
Have your contact information on your cards and an online presence established including any social media outlets that you find useful. Have your online store full of everything that you carry. I have had a lot of out of town customers browse but not want to buy but as soon as they got home found me again and purchased online. A majority of your sales will be tourism if you live in a place anything like my beautiful home in Montana. This summer I will be offering to ship things right there on the spot for folks. I will have priority mail flat rate bubble envelopes and be ready to seal it up and ship it out at the end of the weekend. I have never tried this but this will be my new addition to customer service for the coming season.
There are a tons of locals who will be your fans and support you and they should not be forgotten or left out. Always be gracious and thankful to every single person that enters your booth and be excited that they are looking at your work. Kindness is always so important in life and will leave you feeling fulfilled and happy at the end of the market.
If you are looking for a cheap and high quality place to get your cards printed there are a ton of options but I have been going with overnightprints.com They have a huge variety of products that you can print. But it is best to have your own design using their template. There are tons of tutorials on how to do that so don’t let that scare you off! They have really great deals on cards that has saved me a ton of money and given me very professional promo tools for my business.
I conclude by saying good luck and also if you have any questions about what it’s like to vend, what to expect or anything please feel free to ask in the comments or email me! And don’t for get to check out my Etsy shop! I am blogging in my spare time and I am a full time working artist so please show some love so I can keep returning the love with tutorials, pictures and other awesomeness. You get 15% off your first order just for checking out my blog so head on over and enter coupon code WORDPRESS15 at checkout. Thank you so much for reading everyone!